Maintenance mode lets you provide a user-friendly warning to your customers instead of an unusable website during maintenance.
It also allows you to do any maintenance work safely and ensure that users who require access to your website can still access it.
This article will show you How to Keep Website under Maintenance. It also teaches you how to improve the appearance of your maintenance mode website. More enjoyable, valuable and user-friendly.
What Is WordPress Maintenance Mode?
The WordPress maintenance mode refers to a condition that your site can be put into when you must complete a handful of administrative tasks that could impact the website’s performance or render it inaccessible.
In the ideal world, your website would not experience any downtime. But, there are times when it’s better to shut down your website to make room for the “be returning soon” splash page rather than be at risk of exposing the privacy of your customers and money by having a flawed website.
When Is the Best Time to Use Maintenance Mode?
The maintenance mode setting is the feature WordPress will automatically apply to a site when installing a software update.
Instead of showing your website’s address to users when an update is in progress and possibly sending them the error page, WordPress temporarily disables the website and displays a message in maintenance mode.
It’s not only WordPress that has the ability to take your site offline by using maintenance mode temporarily. You can do it, too.
A lot of times, when you update the website (or even make it the first time), it won’t require WordPress maintenance mode.
Creating a blog post, changing your contact details, or editing an old link are minor changes that visitors will not suffer from.
If you’re performing more substantial changes to your website, you’ll want to remove it from the internet. You can try scheduling your updates at times when you believe your visitors will be sleeping.
However, it’s not a 100% sure-fire method. Here are a few reasons you should use maintenance mode:
- Rebranding a whole website.
- The addition of new or other information to an already popular page.
- Installing a plugin that will provide your site’s latest feature or feature.
- Troubleshooting and error or bug.
- Cleaning up a website that was defaced following an incident with security.
- An announcement of the launch of a business with the words “coming very soon” to create buzz as it’s being developed.
Also, if you think that a major overhaul is required to be completed or you are aware that the site’s design will deter visitors in this case, you should activate maintenance mode in WordPress.
How to Keep Website under Maintenance
Now, let’s look at the various ways you can set WordPress in maintenance mode. There are lots of options to apply for this, but we’ll examine three of them:
- Some custom code.
- A maintenance mode plugin
- The maintenance mode feature of Elementor
This article will provide step-by-step guides for each and take you through the process of how everything functions.
Utilizing a Simple Code Snippet
This technique is ideal for new websites since they don’t have a potential crowd to be losing. This method is also easy and affordable. It is required to include the code snippet below into the functions.php file on your website’s current theme.
This code snippet applies to those not connected to your site. If you’d like to toggle on the maintenance mode, you can comment on the Add Action() filter, then take out that comment “//” to enable the maintenance mode once more.
Using Plugins for WordPress
This technique is for individuals who don’t want to touch any code. Install the WordPress Maintenance Mode plugin.
After activation, set the plugin’s settings: select Settings->Maintenance Mode from the right tab.
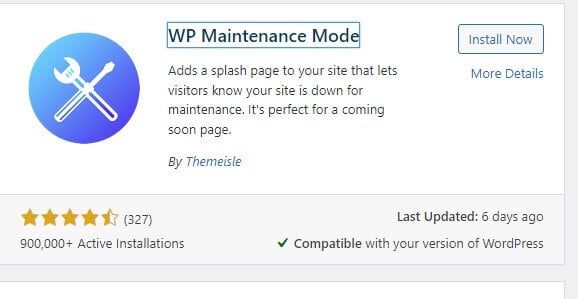
There are five tabs on the settings page: General, Modules, Bot Management, and GDPR. See the explanations below:
General
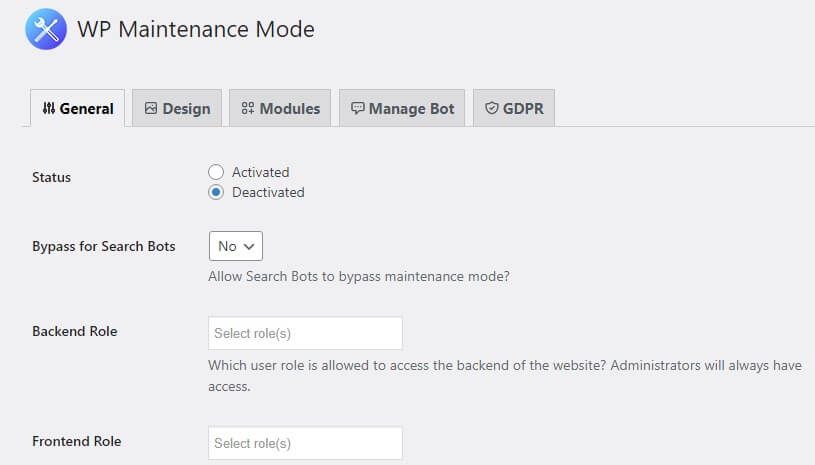
The General tab is the first. If you go to General, you’ll see the status at the top of the page. Please change it to Active to activate the plugin and put your website under WordPress maintenance mode. There is a search bot crawl feature under the status settings.
Search engines will visit your website while the service is in progress if this option is selected.
After that, you can choose which user roles have access to your backend whenever it is under maintenance using the Backend Role as well as Frontend Role choices. If you don’t select them, only the admin may access them.
Design
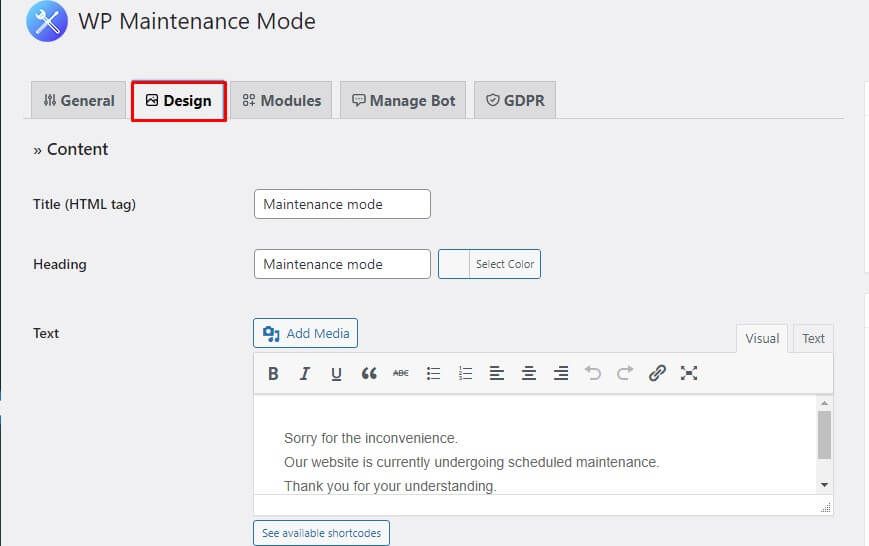
The Design option allows you to design a splash screen. You may start by selecting the Title (HTML Tag) selection. Add a title and text to your splash screen here.
After posting, you may modify the backdrop of your service page. In other words, the colour may be altered or a picture utilized as a backdrop.
Modules
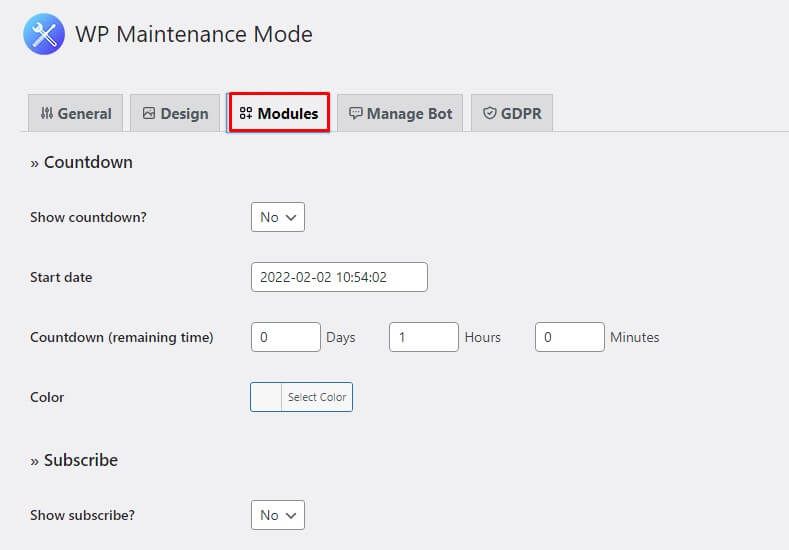
This tab controls the countdown timer. Set start and end times. You can also ask your followers to sign up to get a notification when your website is back up and running.
The next tab, Modules, allows you to configure your social networks. It’s as simple as posting a link to any social network account. The plugin displays the social networking symbol on the page.
Bot Management
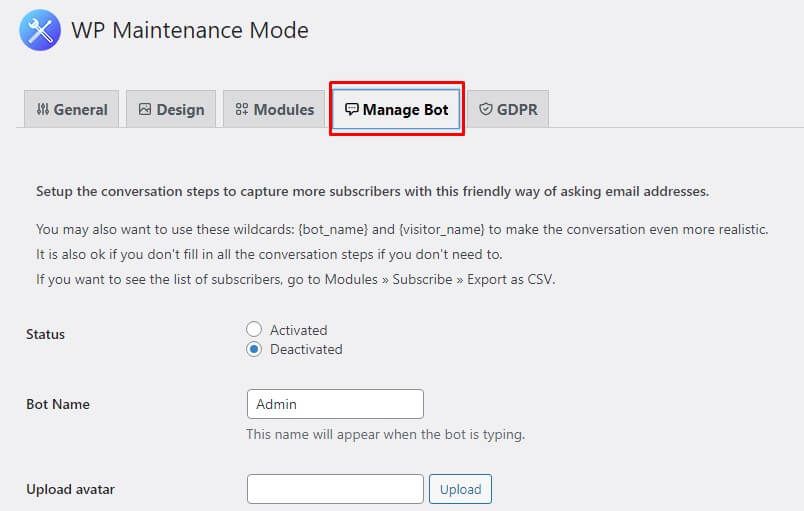
The Manage Bots section is also helpful. This page enables you to customize your splash screen with a chatbot. This way, even while you’re offline, you can engage with your guests. You may even name and avatar the bot.
GDPR
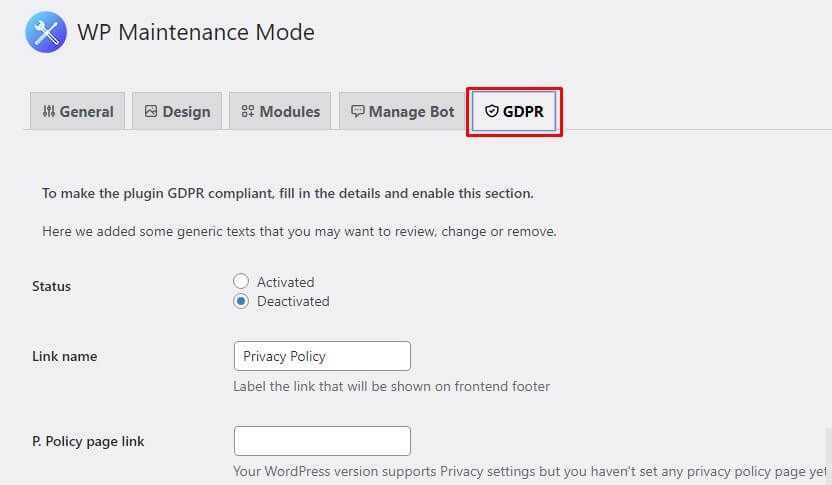
GDPR tab customization is required if people sign up for your splash page. You must enable this if you gather data from your visitors. After that, click Save Settings and navigate to your website.
Do you know WP maintenance mode is create by Themeisle and here is my review about Themeisle.
Create a new WordPress into Maintenance Mode using Elementor
You’re using Elementor (or you’re interested in trying it out). There’s no reason to install third-party solutions for maintenance mode since Elementor already comes with its maintenance mode, as well as the feature is coming soon. Through this option, you’ll be in a position to make:
If you’re not using Elementor, then you’ll need to install it before you do. Here’s how you can configure maintenance mode.
To do it Go to Dashboard > Elementor > Tools > Maintenance Mode > Choose Mode > Maintenance > Save Changes.
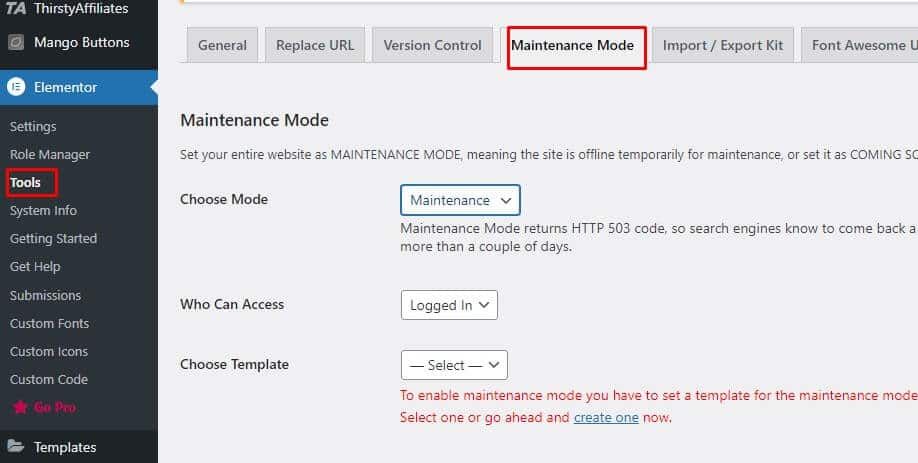
- A unique maintenance mode style is displayed during maintenance for a short time.
- A dedicated page for coming soon, which you can show as you build your website.
The best part about this option is that you can utilize Elementor’s drag-and-drop builder that is visual to create the page your users will view when your website goes into maintenance.
How to Keep Website under Maintenance: Conclusion
Running and sustaining a website involves regular updates and minor tweaks. However, if your site will be down while you’re working on it, it’s best to put it in “maintenance mode” so your visitors know what’s going on.
More WordPress Tips
How to add Google Map address on WordPress?
How to Make a Photo Widget on WordPress Site
How to Center Menu in WordPress using CSS Settings
Affiliate Disclosure: Some of the links in this post are affiliate links, which means I may earn a small commission if you make a purchase through those links. This comes at no extra cost to you. Thank you for your support!


This is a very helpful blog, thank you for sharing and keep posting!