

Activating or disabling WordPress plugins from cPanel is a critical troubleshooting procedure that allows webmasters to manage plugin execution states directly via File Manager or phpMyAdmin when locked out of the WordPress administrative dashboard (/wp-admin/). Fatal PHP errors, plugin incompatibility conflicts, and memory limit crashes frequently cause the “White Screen of Death” (WSOD), blocking standard backend access. Using cPanel administrative utilities bypasses WordPress execution layers to deactivate faulty plugins in under 60 seconds.
Preventing plugin conflict lockouts requires deploying reliable server infrastructure with built-in staging environments. When managing complex multi-plugin installations, selecting an enterprise hosting provider is critical; our evaluation of best WordPress hosting details hosting platforms featuring 1-click plugin recovery and automatic rollbacks.

Method 1: Disable Plugins via cPanel File Manager (Directory Renaming)
Disabling plugins via cPanel File Manager is the most reliable emergency method to deactivate conflicting extensions without altering database tables.
The step-by-step procedure for File Manager plugin deactivation is outlined below.
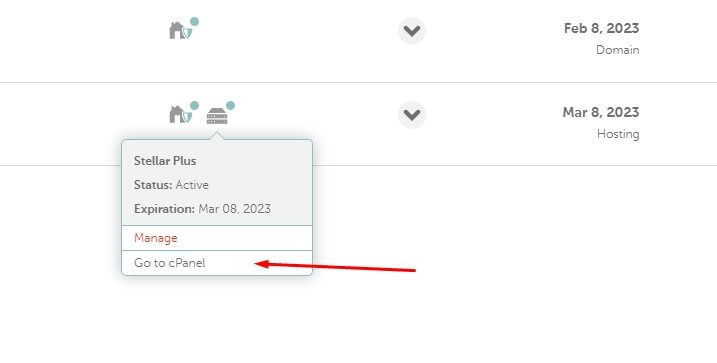
- Step 1: Log into your web hosting control panel account (such as Bluehost, GoDaddy, or A2 Hosting) and navigate to the cPanel dashboard.
- Step 2: Locate and open File Manager from the “Files” section in cPanel.
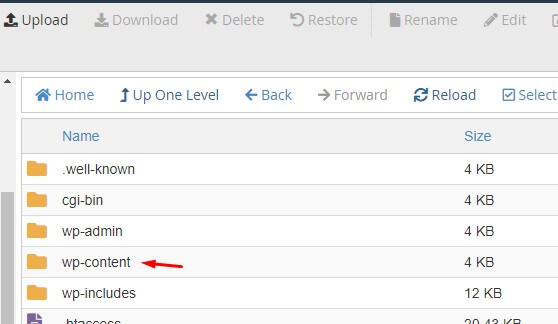
- Step 3: Navigate to your WordPress root directory, typically located at
public_html/wp-content/plugins/. - Step 4: To disable ALL plugins simultaneously, right-click the
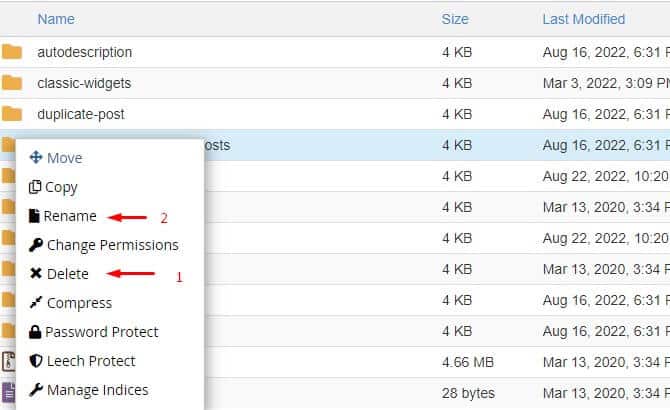
pluginsdirectory, select Rename, and change the folder name toplugins-disabled. - Step 5: To disable a single problematic plugin, open the
pluginsfolder, find the specific plugin folder, and rename it toplugin-name-deactivated. - Step 6: Refresh your WordPress login page; WordPress will detect the missing folder and automatically set the plugin status to inactive.
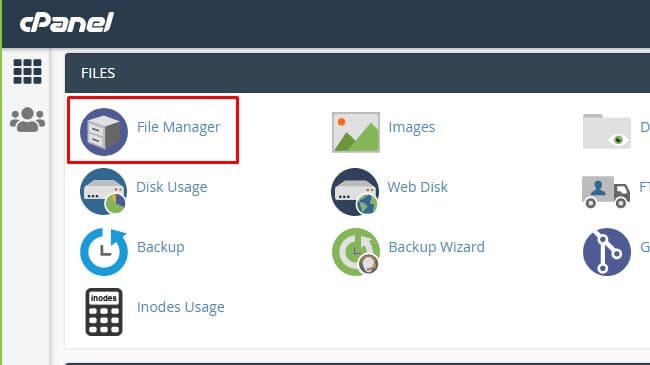
Accessing the cPanel file hierarchy allows direct management of core WordPress folders and configuration files during critical website outages.
Renaming specific plugin directories forces WordPress to immediately unload the conflicting scripts, restoring administrative dashboard accessibility.
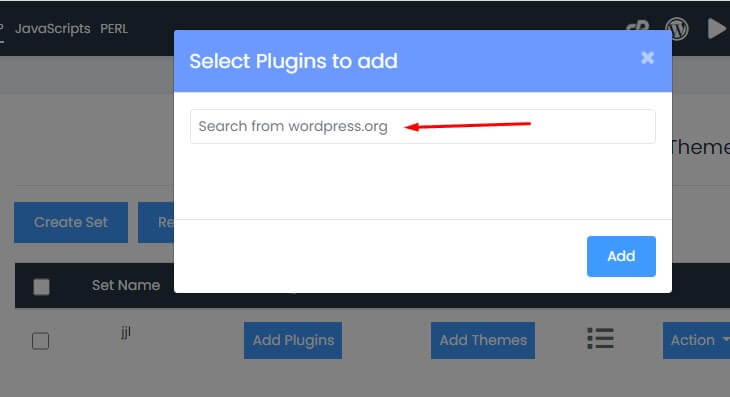
Method 2: Manage Plugins via phpMyAdmin (Database active_plugins Option)
Managing plugins via phpMyAdmin allows webmasters to activate or deactivate extensions by editing the serialized active_plugins array directly inside the wp_options database table.
The structured database modification steps are detailed below.
- Step 1: Open phpMyAdmin from the “Databases” section inside your cPanel dashboard.
- Step 2: Select your WordPress database from the left-hand navigation tree.
- Step 3: Click on the
wp_optionstable (note: your table prefix may differ, e.g.,wp7a_options). - Step 4: Locate the row where
option_nameequalsactive_plugins. - Step 5: Click Edit on the
active_pluginsrow. - Step 6: To deactivate all plugins immediately, replace the
option_valuestring witha:0:{}and click Go to save changes.
Comparison of Plugin Deactivation Troubleshooting Methods
Comparing cPanel troubleshooting methods helps administrators select the safest recovery path during emergency downtime incidents.
| Recovery Method | Technical Skill Level | Execution Time | Risk Level | Best Use Case |
|---|---|---|---|---|
| File Manager Renaming | Beginner (No coding) | 30 to 60 seconds | Very Low | Fixing fatal PHP crashes & White Screen of Death |
| phpMyAdmin Editing | Intermediate (Database) | 1 to 2 minutes | Moderate | Bulk resetting active plugin states cleanly |
| WP-CLI Terminal Command | Advanced (SSH Terminal) | 10 seconds | Low | Instant command-line management for developers |
Frequently Asked Questions About Managing WordPress Plugins from cPanel
Does disabling a plugin from cPanel delete its settings and data?
No, renaming a plugin directory or disabling it via cPanel only deactivates script execution; all plugin configurations, custom post types, and database tables remain completely intact.
How do I re-enable a plugin after disabling it in cPanel File Manager?
To re-enable the plugin, change the folder name back to its original name in File Manager, log into your WordPress administrative dashboard, and click “Activate” under Plugins > Installed Plugins.
What causes the WordPress White Screen of Death (WSOD) after plugin updates?
The White Screen of Death is typically caused by fatal PHP syntax errors, memory limit exhaustion (under 256MB), or script conflicts between newly updated plugins and active themes.
Can I activate a new plugin directly using cPanel File Manager?
You can upload and extract a plugin ZIP file into wp-content/plugins/ via File Manager, but the plugin must be activated via the WordPress dashboard, WP-CLI command, or phpMyAdmin database record.
Affiliate Disclosure: Some of the links in this post are affiliate links, which means I may earn a small commission if you make a purchase through those links. This comes at no extra cost to you. Thank you for your support!

I’m Abdullah Prem, a passionate blogger with over 10 years of experience. I created BloggersNeed to produce high-quality, easy-to-understand articles, guides, and tutorials that help people start their blogging journey. Specializing in WordPress, Hosting, Themes, and online money-making strategies, I’ve been featured on leading tech platforms such as Tech.co, Cloudways, Business2Community, Leadpages, GoodFirms, and ShareThis. BloggersNeed.com