
Do you want to optimize images on WordPress?
If yes, then your website got a lot of images, and it really slows down your website loading speed, and you’re getting red warnings in the Google speed test result and your Core Web Vitals are also failing, and you’re looking for some ways to compress your website images.
Want to go from red to green and pass all the Google’s speed test? Then here is the method that we use to compress all our images in this website without losing the quality.
How do I optimize images in WordPress?
There are many ways to compress and optimize your website images and the key to best image optimization is picking the right plugin that will fit your specific website needs.
There are a few popular image optimization plugins that you can use to optimize images on WordPress, such as Imagify, WP smush and short pixel.
On this website we use Imagify, and it does wonders and optimizes images in single and bulk.
Now let’s see the 2 ways to optimize any images.
Method 1: Using Imagify.io WordPress Plugin
Imagify is the plugin we use on this website. That’s why we are going to use Imagify to compress and optimize images and pictures.
About Imagify.io
Imagify.io is a freemium plugin to optimize heavy size to lighter one without sacrificing the original quality. You can compress images into formats like Jpg, JPEG, PNG, WebP, etc.
Features
- Optimize all the images on your website with a single click
- Chane the size of the image
- Restore to the original version when needed.
- Two compression levels
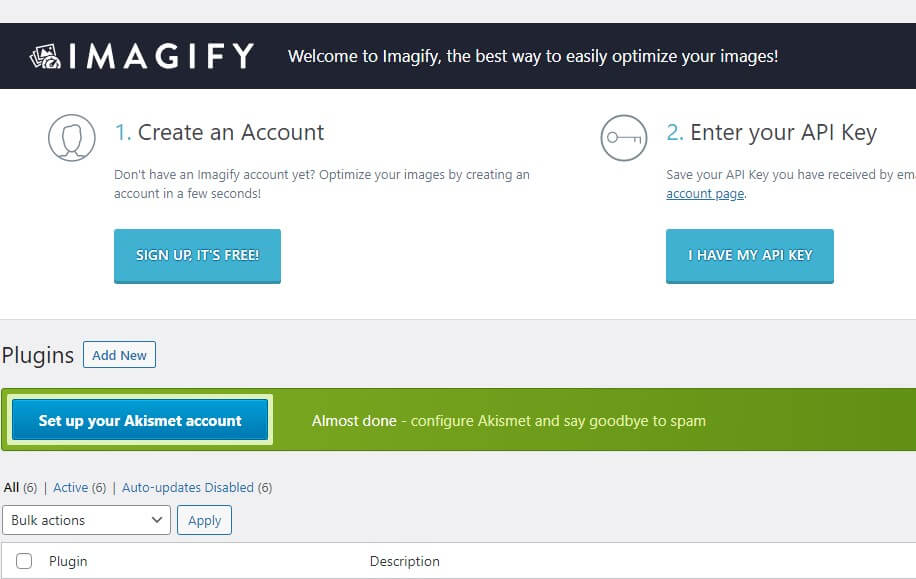
Now let’s optimize the image. To do it, install the Imagify plugin on your WordPress. If you don’t know to install a plugin, here is the guide on how to install a plugin on WordPress.
Create an account on Imagify and get a free API key, and enter it on your website and activate the plugin.
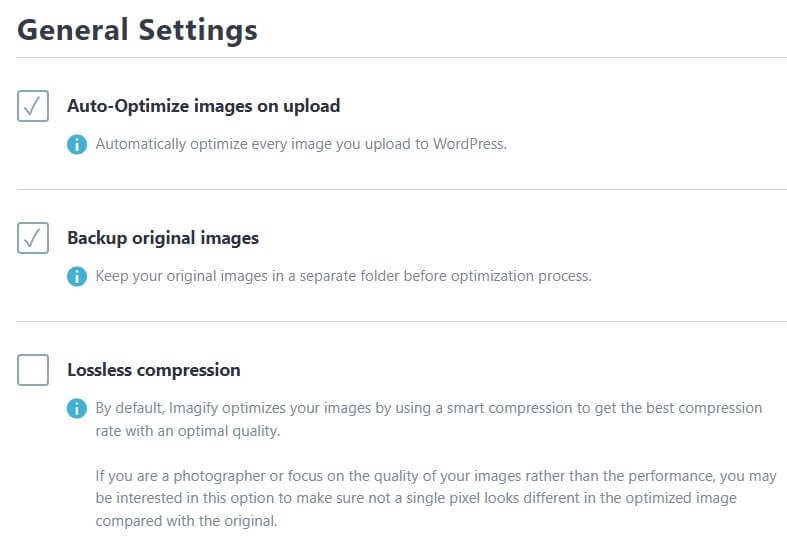
Now go to the settings, and you will see general settings like Auto optimize images on upload and backup original images, check both boxes.
By doing it all your images will automatically be compressed when uploading them and original images will be backuped in a folder, so you can restore them whenever you need it.
You can also resize your larger images to maximum pixel width.
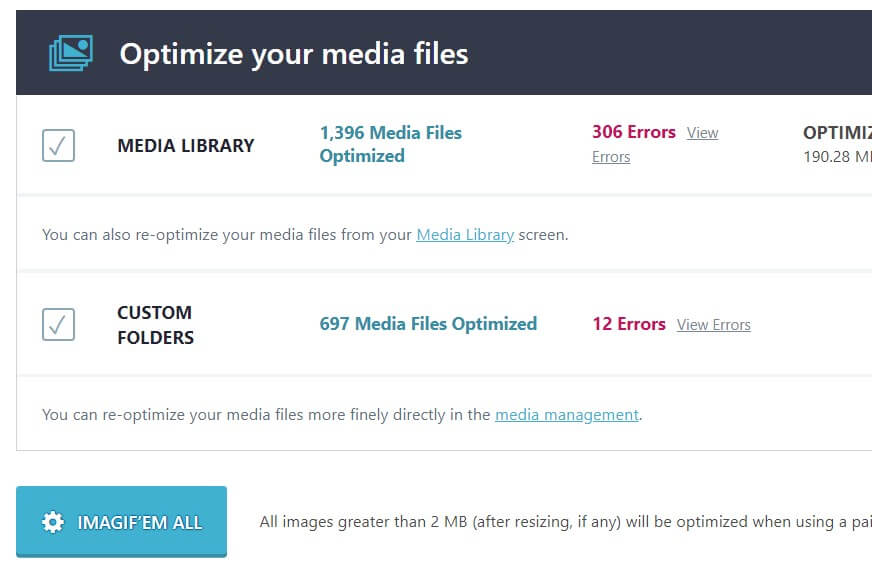
Now go to the Bulk Optimization settings to compress your existing images on your website. Now in the below of the screen you will see IMAGIF’EM ALL option.
Before clicking it, you should select Smart or Loseless compression.
Smart Compression will automatically adjust the level of compression to keep it quality.
Loseless compression will compress the image to a minimum level to protect its original quality.
Choose Smart compression and click the IMAGIF’EM ALL button.
Note: If you’ve large image files, then it will take around 30 minutes to optimize all of it. So you need to have patience when doing this task.
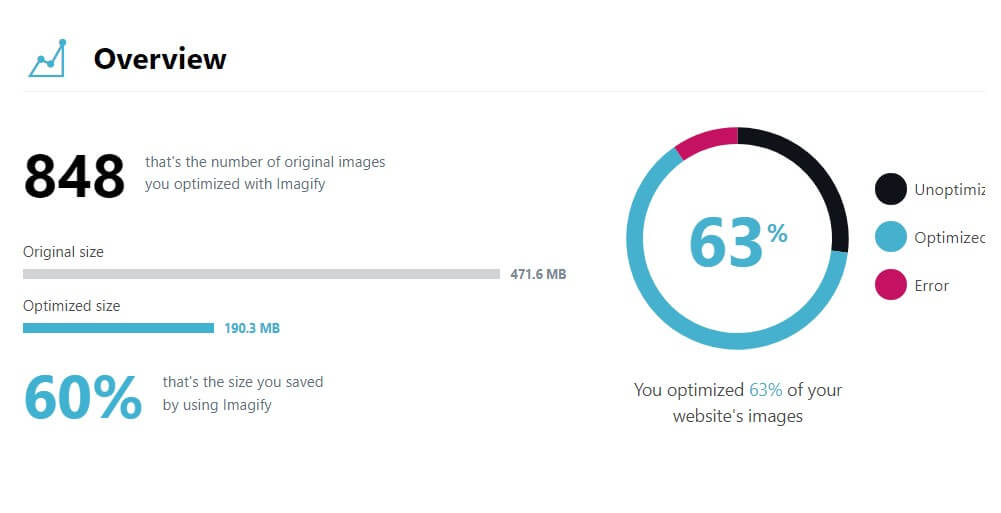
You will get this result after the bulk process is finished. On our website we had more than 800 plus images that sized around 471.6 MB of file size and after the process our website images compressed to 60% size and now the file size of the image is 190.3 MB.
Using Imagify plugin you can also convert your images into WebP format, which will decrease the size of the image.
Note: In this tutorial we have used Imagify, but there are other image optimization plugins as well, like WP smush and Shortpixel which you can also use.
Now you have learned to optimize images on WordPress, now we will show another way to compress images using one website.
Here is the image compression size after using Imagify.
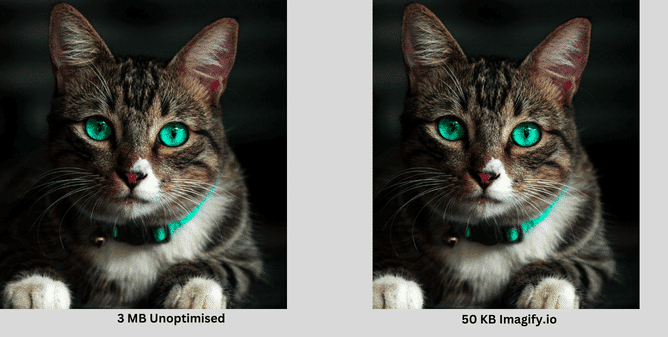
Tips: Want to 10X your image loading time then you should use a CDN like RocketCDN or Cloudflare. Using a cache plugin like WP Rocket you can enable Lazy loading feature which will cache the image for your browser so that it loads only when user browses to that image on your website.
Method 2: Optimize Image Without Plugin
If you want to optimize an image without WordPress plugin means, then here is the easiest way to do it.
About TinyPNG
TinyPng is the best image-optimizing website. We have been using this site to reduce the image size of our other website projects. You can compress the image files like WebP, PNG and JPEG and GIF, JGP are not allowed here.
At a time you can compress up to 20 images with a maximum of 5 MB each. To compress more than 20 images you need to buy their pro plan.
We have been using their free plan for more than 4 years and still love it.
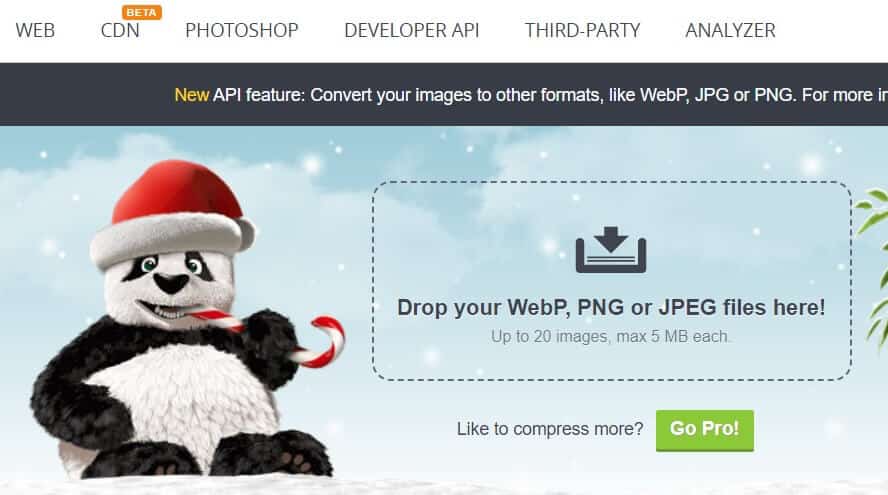
Visit Tinypng.com and drag images from your computer or laptop and drop them in to the website. Within 10 seconds all your images will be compressed, and you can download the compressed image one by one or download all at one or save to Dropbox.
For this tutorial we have compressed 7 images using Tinypng and here is the file size result.
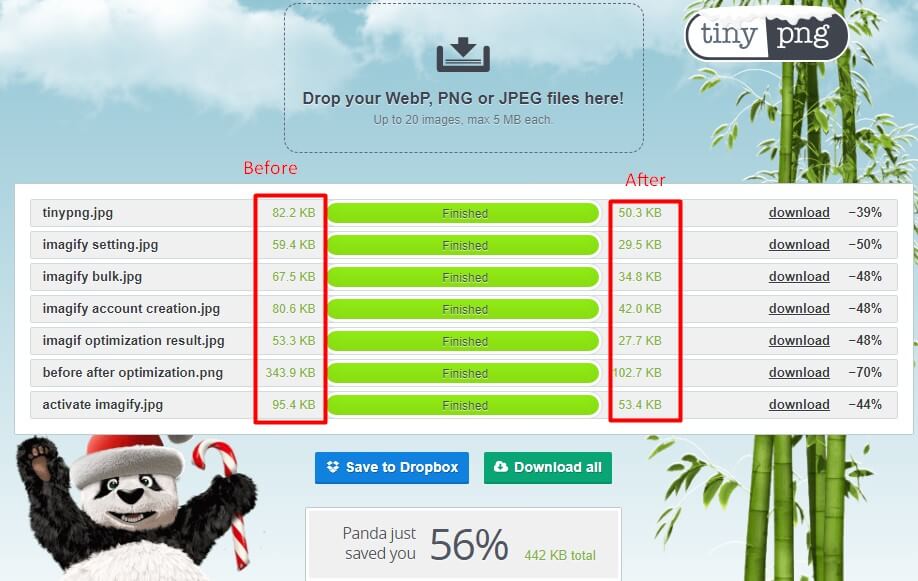
The images produced by TinyPng are perfectly viewed on browsers and mobile devices without losing its image quality.
You can also use this website to compress images of logos or web pages. TinyPng is the best solution if you want to optimize image size without losing quality, and it will save a lot of your time.
Benefits of Image Compression
Reduced File Size: Compressing the image makes the size of the image even smaller, which will make it easier to transfer and store the image on the server. It will be really useful if you want to send an image via email or upload it to a website.
Reduces Bandwidth: Optimizing the image will reduce the size of the data which will load from the server which will save the bandwidth. Which reduces the cost of web hosting and applications.
Faster loading times: Small file sizes will load quickly on web browsers and mobile devices. Which will improve the user experience when browsing the website or app using the internet.
Better Image Quality: Optimizing technique will improve the visual quality of the images, if the original version has some sort of noise.
Improved Performance: Using compressed images on the website or app will surely increase the performance when loading.
How to do Image SEO? The Best Practices
We have discussed the various methods to decrease the size of the image on WordPress. Now we will show how to do Image SEO to rank your image on search engines.
No matter how much you optimize your images for size, ranking your webpage is purely dependent on SEO.
Here are the tips.
- Use keywords as your file name, for example, if you’re writing an article about web hosting pricing and have an image about the plan and price of the hosting. Then make sure you name the image like web-hosting-pricing.png.
- Alt tags are essential for image optimization, as search engines use them to determine the intent of images. Include your file’s alt tags with the filename and keyword in each HTML tag. You can do this using Rankmath plugin.
- Include a high-quality image that’s relevant to your content on every page you host. In other words, if you have an article about web design, include high-resolution images of web designs from reputable websites.
- Make sure all URLs load without errors by using optimize images for load time.
- And finally, if you’re using other website image means then give them credit by linking their website URL below the image.
Conclusion
By optimizing your images by the given method, you can increase the load time of your website which will pass the Google’s Core Web Vitals test and your website will get increase in website visitors through search engine rankings.
Compressing the images can save bandwidth and storage space on your server, so it is always a good practice to use high-quality image compression when possible.
Image Optimization for WordPress FAQs
-
Does WordPress optimize images automatically?
No, WordPress will never optimize the image automatically, and you should use a plugin or tool to do the task. Whatever size you upload, you get the same size on the output.
-
What is the best image optimizer for WordPress?
Like we said, Imagify is the best option to optimize images in bulk without loss in quality, but there are options like WP Smush, Short pixel and Ewww optimizer.
-
Lossy compression vs Lossless compression
Lossy compression formats sacrifice quality and eliminate certain information to achieve smaller file sizes. Whereas lossless compression methods, such as PNG, compress the image data and save it with no loss of image quality by saving its original quality.
